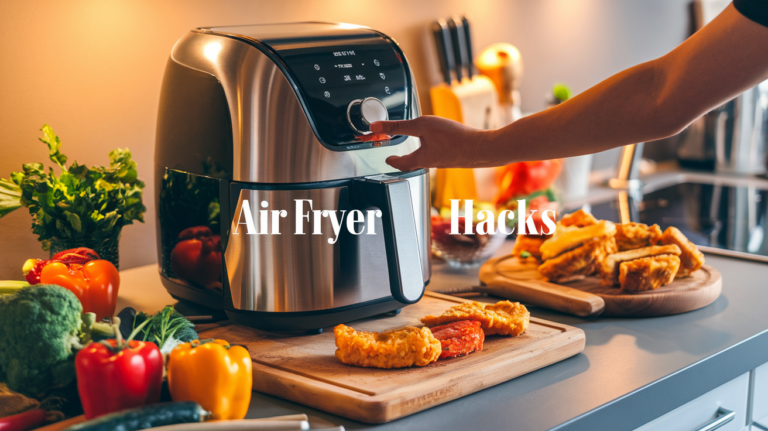
How to Roast Butternut Squash Perfectly
Are you tired of soggy, flavorless butternut squash that disappoints your taste buds? Look no further! Roasting butternut squash to perfection is an art form that can elevate your culinary creations to new heights. Whether you’re a seasoned chef or a kitchen novice, mastering this technique will unlock a world of delicious possibilities.
Imagine sinking your teeth into golden-brown butternut squash cubes, bursting with a sweet, nutty flavor and a melt-in-your-mouth texture. From cozy fall dinners to vibrant summer salads, perfectly roasted butternut squash is a versatile ingredient that can transform any dish. But achieving that ideal balance of caramelization and tenderness can be tricky without the right know-how.
This comprehensive guide will walk you through every step of the process, from selecting the perfect squash to exploring exciting flavor combinations. You’ll learn foolproof methods for preparing, seasoning, and roasting butternut squash that will make you the envy of your dinner guests. So, grab your apron and let’s dive into the world of roasted butternut squash perfection!
Selecting the Perfect Butternut Squash
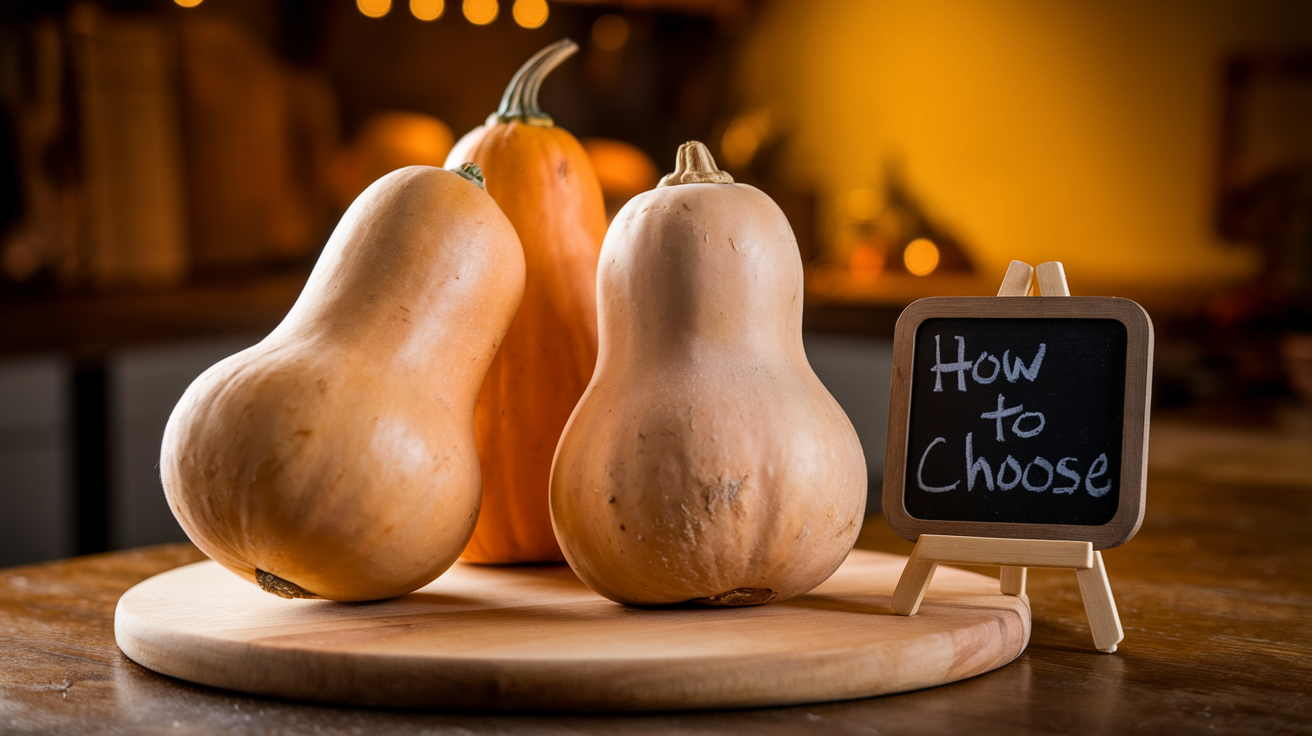
Choose a heavy squash with a uniform beige color
When selecting the perfect butternut squash for roasting, weight and color are crucial factors. Opt for a squash that feels heavy relative to its size, as this indicates ripeness and a higher flesh-to-seed ratio. The ideal butternut squash should have a uniform dark beige or deep tan color across its surface. This even coloration is a sign of proper maturation and optimal flavor development.
Color Indicator Ripeness
Uniform dark beige Ripe
Light yellow hues Underripe
Green patches Underripe
A matte finish on the skin is preferable to a shiny or waxy appearance, as it suggests the squash was harvested at the right time. Avoid squash with green spots or streaks, as these indicate under-ripeness. However, a pale spot where the squash rested on the ground during growth is acceptable and doesn’t affect quality.
Avoid deep scratches and soft spots
Carefully inspect the exterior of the butternut squash for any imperfections:
- Avoid squash with deep scratches or cuts, as these can lead to premature spoilage.
- Steer clear of soft spots, which may indicate rot or damage.
- Ensure the stem is firm, intact, and deep brown.
- Check that the shell is thick by gently attempting to pierce it with your fingernail (it should resist easily).
A quick “knocking test” can also help determine ripeness. Tap the exterior of the squash; a hollow sound indicates it’s ready for roasting.
Store in a cool, dry place for up to two weeks
Proper storage is key to maintaining the quality of your butternut squash:
- Keep whole, uncut squash in a cool, dry, and well-ventilated area.
- Ideal storage temperature ranges from 50°F to 60°F (10°C to 16°C).
- Under these conditions, butternut squash can last up to two weeks.
- For longer storage, temperatures between 50°F and 60°F can extend shelf life up to four months.
- Store away from ethylene-producing fruits like apples and bananas to prevent premature ripening.
Remember that a whole squash will last longer than cut pieces, so it’s best to keep it intact until you’re ready to prepare it for roasting.
Now that we have covered how to select and store the perfect butternut squash, let’s move on to preparing the squash for roasting. This next step is crucial for achieving that delicious, caramelized flavor we all love in roasted butternut squash.
Preparing the Squash for Roasting
Now that we’ve selected the perfect butternut squash, it’s time to prepare it for roasting. Proper preparation is crucial for achieving that delicious, perfectly roasted butternut squash we’re aiming for.
Peel the skin using a vegetable peeler
Start by removing the smooth, thin skin of the butternut squash. A good vegetable peeler is your best tool for this job. Work from the stem downwards, applying gentle pressure to remove the skin in long strips. If you find the squash too firm to peel easily, you can soften it slightly by microwaving it for a short time or placing it in a preheated oven for a few minutes.
Cut the squash in half vertically
Once peeled, place the squash on a stable cutting board. Using a sharp knife, carefully cut the squash in half vertically from stem to bottom. This step exposes the interior of the squash, making it easier to remove the seeds and dice the flesh.
Remove seeds with a spoon
With the squash halved, you’ll see the cluster of seeds in the hollow center. Use a spoon to scoop out these seeds along with any stringy flesh surrounding them. Don’t discard the seeds – they can be roasted separately for a crunchy snack!
Dice into 1-inch cubes for even cooking
To ensure even cooking, it’s important to cut the squash into uniform pieces. Here’s a simple guide to dicing your butternut squash:
- Cut each half into long strips
- Stack a few strips at a time
- Cut across the strips to create 1-inch cubes
| Cutting Method | Advantages | Cooking Time |
|---|---|---|
| 1-inch cubes | Even cooking, versatile | 25-35 minutes |
| Halves | Less prep, good for purees | 45 minutes |
| Slices | Attractive presentation | 30-40 minutes |
By dicing the squash into 1-inch cubes, you’ll achieve even cooking and create versatile pieces that can be used in various recipes, from side dishes to salads and soups.
With your butternut squash now perfectly prepared, we’re ready to move on to the exciting part – seasoning and flavoring options. In the next section, we’ll explore a variety of delicious ways to enhance the natural sweetness of your roasted butternut squash, from simple salt and pepper to more adventurous herb and spice combinations.
Seasoning and Flavoring Options
Now that we’ve prepared our butternut squash for roasting, it’s time to explore the various seasoning and flavoring options that can elevate this simple vegetable to a delicious side dish. The right combination of seasonings can transform your roasted butternut squash into a versatile accompaniment for any meal.
Basic seasoning: olive oil, salt, and pepper
The foundation of any good roasted butternut squash recipe starts with a simple trio of olive oil, salt, and pepper. This classic combination enhances the squash’s natural sweetness while adding a savory depth. Here’s how to apply the basic seasoning:
- Drizzle cubed butternut squash with extra-virgin olive oil
- Sprinkle with kosher salt and freshly ground black pepper
- Toss to ensure even coating before roasting
Optional additions: fresh herbs, garlic, or sweeteners
To further enhance the flavor profile of your roasted butternut squash, consider these optional additions:
| Addition | Flavor Profile | Suggested Amount |
|---|---|---|
| Fresh rosemary | Aromatic, piney | 1-2 sprigs, chopped |
| Fresh thyme | Earthy, slightly minty | 1-2 teaspoons, leaves only |
| Garlic | Pungent, savory | 2-3 cloves, minced |
| Maple syrup | Sweet, caramel-like | 1-2 tablespoons |
| Agave syrup | Mild sweetness | 1-2 tablespoons |
These additions can be mixed with the olive oil before tossing with the squash cubes. Fresh herbs and garlic add an aromatic dimension, while sweeteners like maple syrup can create a delightful caramelization during roasting.
Experiment with spices like cinnamon or Cajun seasoning
For those looking to venture beyond the basics, experimenting with various spices can lead to exciting flavor combinations. Here are some spice options to consider:
- Cinnamon: Adds warmth and complements the squash’s natural sweetness
- Cajun seasoning: Brings a spicy, savory kick to the dish
- Cumin: Provides an earthy, slightly nutty flavor
- Onion powder: Enhances the overall savoriness
- Cayenne pepper: Adds a touch of heat for those who enjoy spice
Mix these spices with olive oil before coating the squash. Start with small amounts (1/4 to 1/2 teaspoon) and adjust to taste. Remember, you can always add more, but you can’t take it away once it’s mixed in.
With these seasoning options at your disposal, you’re now ready to move on to the actual roasting methods. The flavors you’ve chosen will develop and intensify during the cooking process, resulting in a deliciously seasoned butternut squash dish.
Roasting Methods
Now that we’ve explored various seasoning and flavoring options, let’s delve into the different methods for roasting butternut squash to perfection.
Halved squash: 45 minutes at 375°F (190°C)
For those who prefer to roast their butternut squash in halves, this method is ideal. After preparing and seasoning your squash:
- Preheat your oven to 375°F (190°C).
- Cut the squash in half lengthwise and remove the seeds.
- Brush the flesh with olive oil or butter and add your chosen seasonings.
- Place the halves cut-side down on a baking sheet.
- Roast for approximately 45 minutes or until the flesh is tender when pierced with a fork.
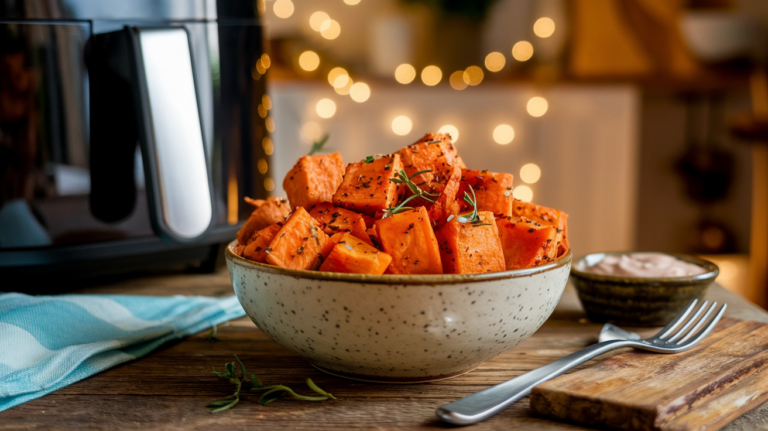
Cubed squash: 25-35 minutes at 400°F (200°C)
For faster cooking and more caramelized edges, try roasting cubed butternut squash:
- Preheat your oven to 400°F (200°C).
- Peel the squash and cut it into 1-inch cubes.
- Toss the cubes with olive oil and your preferred seasonings.
- Spread the cubes in a single layer on a baking sheet.
- Roast for 25-35 minutes, or until the cubes are tender and golden brown.
Place on parchment-lined baking sheet
To ensure easy cleanup and prevent sticking, always use a parchment-lined baking sheet for both halved and cubed squash. This simple step will make your roasting process much more convenient.
Ensure even cooking by stirring halfway (for cubed)
When roasting cubed butternut squash, it’s crucial to stir the cubes halfway through the cooking time. This ensures even browning and prevents any pieces from becoming overly crispy or burnt.
| Roasting Method | Temperature | Time | Key Tips |
|---|---|---|---|
| Halved Squash | 375°F (190°C) | 45 minutes | Place cut-side down |
| Cubed Squash | 400°F (200°C) | 25-35 minutes | Stir halfway through |
By following these roasting methods, you’ll achieve perfectly cooked butternut squash every time. The halved method is excellent for those who want to scoop out the flesh for purees or mashes, while the cubed method is ideal for dishes that require distinct pieces of squash.
With your butternut squash now roasted to perfection, you’re ready to explore the many ways to serve and use this versatile vegetable in your culinary creations. From simple side dishes to complex main courses, the possibilities are endless.
Serving and Using Roasted Butternut Squash
Now that we’ve mastered the art of roasting butternut squash, let’s explore the myriad ways to serve and use this delectable autumn vegetable.
Versatile side dish for fall and winter entrees
Roasted butternut squash shines as a versatile side dish, perfectly complementing a wide range of fall and winter entrees. Its sweet, nutty flavor and tender texture make it an ideal accompaniment to:
- Grilled chicken
- Pork tenderloin
- Roasted turkey
- Vegetarian main courses
The caramelized edges and soft interior of roasted butternut squash add depth and warmth to any seasonal meal.
You may also like
- butternut squash sauce
- squash pasta sauce
- Whipped Mashed Potatoes
- Vegetarian White Bean Chili
- ravioli soup
Ingredients in pasta, salads, soups, and grain bowls
Beyond its role as a side dish, roasted butternut squash can elevate various dishes:
| Dish Type | Usage Ideas |
|---|---|
| Pasta | Toss with penne and sage for a comforting meal |
| Salads | Add cubes to mixed greens for a hearty autumn salad |
| Soups | Blend into a creamy butternut squash soup |
| Grain Bowls | Combine with quinoa, kale, and roasted chickpeas |
The possibilities are endless, allowing you to incorporate this nutritious vegetable into your meal rotation with ease.
Use in sweet dishes like puddings or pies
Surprisingly, roasted butternut squash’s natural sweetness lends itself well to desserts:
- Butternut squash pudding: A creamy, spiced alternative to traditional puddings
- Pies: Use as a filling, similar to pumpkin pie
- Custards: Incorporate into a silky, autumn-inspired dessert
The roasted squash’s rich flavor and smooth texture create delightful sweet treats that capture the essence of fall.
Substitute for pumpkin puree in recipes
Roasted and pureed butternut squash serves as an excellent substitute for pumpkin in various recipes:
- Pumpkin bread
- Muffins
- Pancakes
- Smoothies
This substitution works seamlessly, often providing a similar color and consistency while offering a subtle flavor variation.
With these serving suggestions and uses in mind, next, we’ll explore the best methods for storing and preserving your roasted butternut squash to ensure you can enjoy its deliciousness for days to come.
Storage and Preservation
Now that we’ve explored how to serve and use roasted butternut squash, let’s delve into the best practices for storing and preserving this delicious autumn vegetable.
Refrigerate for up to five days
After roasting your butternut squash, you can store it in the refrigerator for short-term use. Here’s how:
- Place the roasted squash in an airtight container or sealed plastic bag
- Store in the refrigerator for 3-5 days
- For best quality, consume within 3-4 days
Remember, refrigeration is not recommended for whole, uncooked butternut squash as it can affect the texture and flavor.
Freeze for three to four months
For long-term storage, freezing is an excellent option. Follow these steps:
- Allow the roasted squash to cool completely
- Cut into desired sizes or puree
- Flash freeze on a baking sheet
- Transfer to a freezer-safe container or bag
- Label with contents and date
- Store in the freezer for up to 6-8 months
| Storage Method | Preparation | Duration | Best Used Within |
|---|---|---|---|
| Refrigeration | Roasted | 3-5 days | 3-4 days |
| Freezing | Cubed/Pureed | 6-12 months | 6-8 months |
When ready to use, thaw frozen squash in the refrigerator before reheating or incorporating it into recipes.
Roast and save seeds for a crunchy snack
Don’t discard the seeds! They can be transformed into a delicious, crunchy snack:
- Clean the seeds, removing any pulp
- Pat dry with a paper towel
- Toss with olive oil and your favorite seasonings
- Spread on a baking sheet
- Roast at 325°F (165°C) for 20-25 minutes, stirring occasionally
Store roasted seeds in an airtight container at room temperature for up to a week.
By following these storage and preservation methods, you can enjoy your perfectly roasted butternut squash long after the initial preparation, reducing waste and always having this versatile ingredient on hand for your favorite recipes.
Mastering the art of roasting butternut squash opens up a world of culinary possibilities. From selecting the perfect squash to exploring various seasoning options and roasting methods, you now know to create a delicious and versatile side dish. Whether you prefer it halved, sliced, or cubed, roasted butternut squash can elevate your meals with its rich flavor and nutritional benefits.
Don’t be afraid to experiment with different herbs, spices, and serving ideas. Incorporate your perfectly roasted butternut squash into soups, salads, pasta dishes, or even desserts. With proper storage techniques, you can enjoy this autumn favorite throughout the week or preserve it for future use. So, grab a butternut squash, fire up your oven, and savor the comforting taste of fall in every bite.